It can be challenging to start creating music when you have no background in it.
But there are some steps that you could do without having any musical experience and they will help you get started with making EDM music.
I’ll be honest, when I started looking at the different ways to make music for EDM, I was intimidated.
Starting points You Need to Know to Make EDM
How do you think most producers learn their craft?
Listening to tons of music in the very same genres and subgenres that inspire them is a big part of this.
Plenty of people start by simply making or ‘mashing up’ songs from tracks they like.
As we move on towards writing these mashups, building off what others have done isn’t copying; it’s learning By trying and refining your skills with each song, you gain invaluable experience which helps in creating unique recordings.
You won’t find success overnight – but if the process looks enjoyable for you (and results tell us otherwise), stick with it. – After some serious talent licensing deals and high-profile remix drops under his belt, Sebastian moved on to producing original material: “I was able to make psytrance because I listened over and over again.”
Doing so will help familiarize you with both musical structures s as well as typical mix/mastering techniques used by artists.
As a new producer, you’ll have to find your niche and decide what you’re good at. Then you need to write down ten goals that will help you reach those goals.
For example: “I want to be able to produce songs for the next year.” You might then write down smaller tasks like, “Write one song in an hour” or “Learn how to use a vocal compressor.” If you can’t accomplish those smaller tasks within a month, move them up on your list of things that need doing.
As long as there are clear steps along the way, it’s okay if some don’t get done immediately. Having big lists helps keep yourself motivated throughout the entire process of creating music.
Stage 1: Beginning
You’re looking to start making your own music but you don’t know where to begin.
You might feel overwhelmed by all the tools and techniques out there, or you might be wondering which of them are actually useful for what you want to do.
This is a common feeling when starting any creative endeavor, especially electronic music production.
What do I need to start making EDM music?
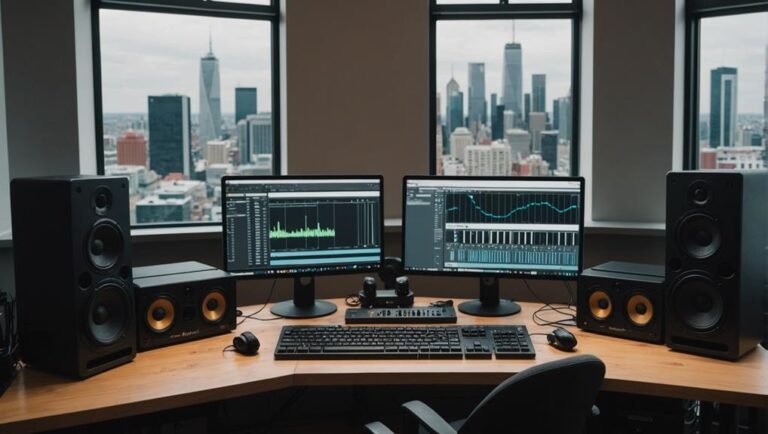
Before you can start writing music, you’re going to need some equipment.
If you don’t already have a computer, the good news is that even your basic laptop will be just fine as long as it has a decent sound card and enough free hard drive space for storing samples.
The other thing you’ll want to get started is a set of headphones. Headphones are much more critical than speakers when it comes to listening critically: their purpose is that you can hear every little detail in your mix before anyone else does.
There are several types of headphones out there; I recommend at least getting yourself one pair with an attached quarter-inch adapter, which allows them to plug directly into any mixer or audio interface without having to use an additional cable.
The good news is that it doesn’t take half-a-million dollars worth of gear (though that helps) to make electronic music; with a few simple pieces of equipment and some basic skills, anyone can get started on their own tracks at home.
What is a digital audio workstation? (DAW)
A digital audio workstation, or DAW for short, is a powerful music production software that allows you to record samples, instruments, and sounds directly into your computer.
While DAWs are most commonly used by musicians and DJs, they’re also widely considered some of the most effective recording tools in professional circles.
As a beginner, you’ll face the dilemma of choosing the right one. The truth is that any program can be useful if put to good use.
But as you progress further into your journey as an artist/producer/engineer etc., it will become harder to switch programs due to what’s known as “Daw Muscle Memory.”
This means that after using one program for long enough (typically 2+ years), it becomes impossible to make full use of other programs without taking months off from production just so you can relearn them all over again.
The first step to learning how to record music is choosing the right digital audio workstation or DAW. If you’ve never recorded a track before, it can be tough trying to decide which software program offers the best features at an affordable price.
The most common names you’ll hear are FL Studio, Logic Pro X, Ableton Live Standard, and Bitwig Studio but there are many more that may fit your needs best.
Most digital audio workstations are based on the same basic platform: track control, and timeline sequencer with automation windows for recording and editing.
Almost every DAW will include a broad range of tools to aid in composing using samples like drum kits or even playing instruments out of your computer or MIDI keyboard.
It’s likely you’ll find an open-source solution if cost concerns are keeping you away from premium DAWs altogether.
Many of us as musicians started off with Garageband which comes free on any Mac computer and has some great features in it such as virtual instruments and loops.
But if you want to go further than what it offers (most basic users will be satisfied with it though) then we recommend getting one of the aforementioned ones listed above depending on how deep into music production you’re going to get yourself into.
There are a number of DAWs (digital audio workstations) on the market and each one has its own pros and cons.
Getting started remains one huge problem for many beginners though, simply because figuring out which order to start using your tools can be difficult.
The process gets even more confusing as you venture deeper into the subject without knowing exactly why things should happen in a specific way as opposed to another.
Even though FL Studio can be downloaded completely free, many people opt to pay just in case they want something more advanced than what comes with the FL Studio Signature bundle (for example surround sound support).
Choose your listening system
If you’re serious about mixing and mastering your own music, or if you want to release a single on the Internet, then it’s time to invest in some studio monitors.
Monitors give you the most accurate reproduction of the sound coming out of your speakers (so much so that they are used by professional engineers who mix hit records for a living), but there are other factors to consider before buying them.
By definition, monitors are speakers that provide a less-controlled listening environment (unless you’re in an acoustically treated studio), though they do provide the benefit of hearing what your song sounds like in a real room.
If you record vocals or acoustic instruments on a regular basis, or if most of the music you listen to is recorded live (i.e., not from MP3 files), then monitors should be your first choice for monitoring purposes.
Monitors won’t tire your ears as quickly, and panning is more natural; with headphones, it can sometimes sound like someone has stuck their finger in between two channels and pulled them slightly off-center when panned hard left or right.
Get a MIDI controller
The most basic way to play music on a computer is with a MIDI controller.
A MIDI controller is a device that lets you control music software using physical controls (such as keys and pads) rather than the computer keyboard.
If you’ve never touched the keys, consider a pad controller (such as the Ableton Push or Novation Launchpad). Pads are great for sequencing and playing on drums, but they can still be used to play melodies and chords.
These devices are simply external keyboards that connect directly to your device, giving you the ability to trigger sounds and perform other actions within your software of choice.
The simplest controllers have only a few keys, while more advanced ones have full piano-style key sets or “pads” that can be programmed in any number of ways without ever touching a keyboard.
A great option for those who haven’t played before but want an easy way into making electronic music.
Get yourself a synth!
A synthesizer produces and processes the sounds that make up an entire track; regardless of whether it’s played by hand or sequenced via MIDI controller, the results are comprised entirely of these building blocks.
No matter what level you’re working at, there is no substitute for experience with a real-deal synthesizer in your studio.
Trying to pick your first synthesizer can be an intimidating process, but fear not!
If you’re reading this tutorial, I assume that getting started with music production is your end goal.
Although there are plenty of different ways to make beats and grooves – whether in Ableton Live, FL Studio, or using lesser-known tools like Renoise – the tools here focus on sample-based synthesis.
Once you understand how synths work, it’s far easier to adapt that knowledge to other instruments that take a similar approach.
For production newbies, there’s nothing quite like Serum to kickstart your creative mind, whether you’re designing a lead or bass.
The graphical interface lets you interact with the wavetable while seeing the sound in real-time – it shouldn’t take long before you have an idea of how this modulation beast works.
Make your first cover song
Every musician must start by making his/her first cover song, as The Beatles sing “take a sad song and try to make it better”.
Cover songs are a great way to get started if you have never recorded before. It also can be fun for intermediate-level singers and instrumentalists who want to mix up their practice routine with some new material.
Start by selecting a song that you love or connect with in some important way – it could be the lyrics, its sound, or maybe even an artist connected with the song.
Also consider how much time you have available for your project: a quick 2-track demo of someone else’s music may take less time than recording your own original tunes from scratch.
First of all, find some songs which are simple to play.
- – If it’s too difficult for you, then you have no chance to make your own music.
- – Don’t forget about Music Theory. You must know Notes, Chords, and Harmony before making a cover song (Download music sheet).
- – Try to play by yourself or with the band and don’t be afraid if it sounds not perfect at the beginning, because practice makes perfect! 🙂
Create your first song
First, you have to understand the key components of music.
A song usually has three sections that are repeated as many times as needed to tell a story or present an idea. The sections, which can be played in any order, are:
– A – Repeated section used for the verses – Where the singer talks about his/her feelings towards the subject matter of the song.
– B – The chorus (the part you will want your listeners to remember) – Here the singer gives their opinion on the subject matter of the lyrics
– C – The bridge, a third section that adds variety and reduces the sense of repetition by presenting something new.- A transition between the chorus and the verse.
Depending on what you’re writing about, this could be anything from a short solo instrument or vocal melody line to completely different chord changes or lyrics that fit with your main theme but aren’t repeated frequently.
To get started on your first song, try taking several ideas around one central concept and grouping them into these 3 categories: verse/chorus/bridge; then write each separately while they all have similar melodies so they flow smoothly together when put back next to each other.
Different people find different pieces appealing for reasons they might not be able to explain.
But like other arts, such as painting and writing, there are common elements shared by most musical compositions.
Music typically consists of four parts: melody (the tune), harmony (a combination of notes played at the same time), rhythm (patterns of stronger and weaker beats in the accompaniment or song itself), and timbre (characteristics unique to instruments).
First, make your drum track
Before you record a drum track, set the tempo.
Tempo is how fast you want your song to playback. For example, a song’s BPM (beats per minute) can be 120 which means that every second of your song will have 60 beats in it.
Also, each quarter note will take up one beat and there are 4 quarter notes in a measure on the top of 8 measures per verse or 16 measures total.
Once you know what kind of “feel” and “groove” you’re going for playing with different tempos will be much easier so make sure to spend some time choosing the perfect tempo for your song!.
Second, write your chord progression
Writing a chord progression is one of the most important things you can do to create a strong song foundation.
Unfortunately, it’s also one of the trickiest parts of making music from scratch. If you don’t have any experience with music theory, there are lots and lots of chords that could work for your particular situation, and knowing which ones will sound best can be difficult to figure out on your own.
Even if you’ve never taken lessons, odds are you know a few chords.
The key is knowing how they are used together so they create ambiance and flow. One quick way to begin building this knowledge base would be to take some music theory courses.
There have been quite a few books published over the years with chord charts showing all twelve major tonalities, as well as harmonic analysis, which offers to guide new writers in avoiding common pitfalls.
Adding in a bass line
Bass lines (also called bass riffs or grooves) are the foundation of popular music.
A bass line can be as simple as playing root notes from chords in a song, or it can be a much more complex solo-like melody.
In order to get the sound I wanted for my groove, I decided to use an octave divider effect and duplicate all my notes one octave lower so that they would support rather than overpower the track.
Adding in the bass line to your chord progressions essentially adds a new dimension and makes more harmony revealed out.
To add the bass line just copy the root of your I chord down an octave or two, where actions are roots are now one note apart.
Take out your melody
The melody is the part of your song that will stay in someone’s head after they listen.
A catchy riff or an earworm beat may get their attention, but it’s the flow and consistency of your melodic elements that will keep them engaged through to the conclusion of your stuff.
It seems obvious, but when trying to capture this kind of success on every track editing can make all the difference between something somebody likes and something they go back to again and again.
The melody is easily the most important part of a song.
It sets the tone and conveys the emotion behind your lyrics.
If you’re not sure what to add or don’t have a melody in mind, try humming melodies from other songs that can be used as examples for yours – even better if there are to fit with your genre’s key too.
Clean up your sounds for better quality with processing
If a music source doesn’t sound good enough to you, it might help if you add something which comes for free in any DAW (Digital audio workstation): An effect.
Paraphrasing and expanding on this topic, adding an effect is an easy way of improving the quality of your recording or mixdown; In fact, just about every song produced electronically goes through some sort of processing step(s) as part and parcel.
A compressor is the first tool in the chain that can make a significant difference to your sound.
A compressor reduces the dynamic range of an audio signal—the difference between its softest and loudest parts.
Compressors are typically used for vocals, but you also use them on guitars, basses, or anything else with naturally high dynamics like strings or piano/synth lines.
You want to squash down those peaks so they don’t jump out at you when listening on earbuds or in noisy environments while preserving all of your beautiful low-end frequencies underneath!
You’ll need some way of boosting up any quiet sounds too so everything remains clear without being drowned out by other instruments – this is what equalization (EQ) does: it boosts certain frequency bands to improve clarity and cut others that may mask important sonic details.
With compression and EQ applied, we’re getting close to achieving our final polished sound output; however there’s still more work ahead!
Perform a mix-down of your track
The first step to making a mix-down is to remove unwanted frequencies through equalization.
Some inexperienced mixing engineers feel as though they are learning something when they binge-watch videos about mixing tips, but without spending actual time practicing those techniques, their knowledge will not be internalized.
The best way for you to practice these techniques is by making an EDM song from start to finish.
It might seem like an intimidating task in the beginning, but with some basic equipment and a little bit of free time, it’s possible even for beginners to make songs that sound professional in a single day, as long as they lower your expectations appropriately.
If you have never made music before, or if this is your first attempt at electronic music production then I suggest taking a low-risk approach during the initiation stage by creating very simple tracks.
Without too much variation between sections (dense areas) or elements (melodies/beats). Many people can make 2-minute trance songs
Stage 2: Exponential Learning
As you spend time learning a skill, you will gradually get better at it.
You may not become an expert right away but your improvements will be noticeable. In this stage of learning, it is important that you follow these four key steps:
Key Step 1: Learning the basics
The word “theory” can scare off a lot of people.
Learning music theory, and more specifically the fundamentals of electronic dance music (EDM), is one of the most powerful investments you can make in your career as a producer.
You’ll be able to compose original tracks much faster because structure and arrangement are all pre-planned from decades of development by composers following standard logic – this will also allow you to stand out from others musically.
A surprising number of inexperienced producers get hung up on what notes to use rather than simply how best to measure different sections so that it sounds great.
This usually leads them down the path of trying several random ideas before finally choosing a very long production period for their track.
Simply learn enough electro house chord progressions or beats patterns part material and keep it simple without becoming too confusing with information overload…
Key Step 2: Quantity over Quality
In key step 2, the key is to finish fast what you start. – The best way to guarantee quality work is not quality time spent working—it’s the quantity of work produced.
Make sure that every week you are creating a piece of work and finishing it before moving on to another one (or even better, before starting it).
We’re learning from our mistakes as we go along; we don’t need to wait until the end result is perfect. In fact, trying for perfection may actually be holding us back from getting things done and making progress.
The idea here isn’t necessarily to create amazing pieces of art or high-quality pieces but simply to start producing and get your ideas out there.
So you can learn how other people respond to them compared with how you think they will respond based on your gut feeling.
Key Step 3: Diversify & Experiment
When you enter into production, your first steps will probably be determined by the style of music that takes your fancy.
I started making dubstep and picked up some valuable skills such as drum programming and sound design.
From there, I branched out over to drum & bass, which taught me a lot about rhythmic complexities found in the jungle.
As time went on, I ventured once more into different genres at times picking them up shortly before abandoning them altogether due to my ambiguity when it came to deciding what each track should feel like.
One thing I noticed along this period was continually wanting one element or another set firmly within any given production as well for example 180 bpm techno rather than 140-170 bpm deeper level grooves, or quirky offbeat percussive elements instead cosmic sounds (produced mainly with organic instruments).
And yet all while saying “what doesn’t kill you makes you stronger” sometimes devoting hours/days even weeks within certain constructs would inevitably lead toward inner reflection and the realization that perhaps what I was after wasn’t there in the first place.
It’s easy to get caught up in some way of thinking that your style is set in stone, but nothing could be further from the truth. It’s more important to experiment with different styles rather than sticking to one particular groove for too long because you’ll only ever know where you are at with your own music when you stop focusing on one genre and start experimenting with a lot of them.
Key Step 4: Get other people involved!
The fourth step is mostly about taking advantage of others’ knowledge while learning as well as making yourself better by getting feedback from other people so they can help guide you along your path towards becoming a producer, which will become clearer as time goes on.
This is also something that will help keep all those ideas flowing at an encouraging pace instead of letting them stagnate and grow stale over time. You need this kind of input in order to make sure that your ideas are as good as possible, and that you’re not just falling back on the same old thing over and over again.
Stage 3: Give Up
To combat this, you have to force yourself out of your comfort zone and stop trying to work on things that you haven’t had any success with. The most important thing is to keep going; don’t get caught up in negativity or doubt. Imagine that whatever you are working on will be successful—and it probably will!
Even if it doesn’t make sense just keep pushing forward. Getting stuck for a few months can happen to anyone, but at some point, inspiration has got to come back so try not to worry about it too much. If all else fails, reach out for help from your friends.
It’s also common for producers of EDM music to start getting bored with the sounds they’ve been making since day one.
So take some time off from producing and listen more broadly across genres – maybe even outside electronic music altogether: go see live bands or catch up on recent movies – whatever inspires you creatively!
Feeling Overwhelmed
First of all, you should understand that being overwhelmed is a common experience.
You don’t need to feel ashamed of it – everyone who makes music experiences this feeling at some point.
The key to getting over your feelings of overwhelm and imposter syndrome is to make music regularly – even if it’s just for 10 minutes a day. The more often you do it the faster you will progress and the less intimidated you will be by the whole process.
It seems like there are always so many things competing for our attention, but most people find ways around their distractions in order to get their work done.
For example, if social media distracts from your productivity, then consider limiting yourself one or two times during the day when you can check in with friends online or read an article about something interesting that happened recently. You might also consider cutting back on time spent watching television.
What do you want to get out of your music?
You might not have a clear answer at first, but it’s important that you start thinking about this.
Your objective and motivation will help guide what kind of songs you make and how much time, effort, and practice go into making them.
The more specific your goal for writing or performing music is, the more likely it is that achieving it will give you satisfaction.
Once you have an overarching reason why you make music (e.g., I love playing guitar), try breaking down the different reasons why in terms of smaller goals (e.g., In order for me to play guitar well enough so that I can join other musicians on stage when they invite me)
Check what you have written down at the begging of your challenge
Learn how to overcome creative block
Creativity is one of the most important skills in life, and yet it’s also one of the hardest to pin down.
It can be widely different things for different people – writing a song, producing electronic music, designing products, or even solving problems at work – but the core factors that drive creativity remain largely mysterious.
Every producer has experienced periods where their ideas are flowing freely, and times when they feel like there’s no new inspiration left within them. The good news is that you don’t have to accept creative block as inevitable!
The main reasons behind creative block fall squarely into 3 categories: 1) You lack skill 2) You’re lacking motivation 3) Mental barriers (self-criticism etc.).
Artist Mindset
This is all part of developing an artist’s mindset, a mindset that keeps you driven and focused on reaching your production goals.
Most importantly, this will keep you motivated over time. No matter how great or small the accomplishment in your music career may be, being consistent with your work ethic will carry you through any obstacles and help elevate your skills to higher levels.
Be patient! Developing these habits can take some time but if you follow through on them consistently then success should come naturally to you as it did for me.
Stage 4: Advanced learning and master
Advanced learning involves going deep into topics.
Mastering music production doesn’t mean being a master of everything but rather knowing enough to get the job done.
Starting with your strong points makes sense because, at the end of the day, music production is too diverse a field to become a master in every area.
In fact, successful producers often have an average or below-average knowledge base in many areas and then focus on gaining mastery in one or two key aspects that serve as anchors for their work.
Even the masters must keep learning: they’ve already gotten past those early stages where they felt overwhelmed; now they know what they’re after and can focus on solving specific problems.
Stage 5: Collaboration
The journey doesn’t end when you master a technique. In fact, that’s just the beginning. – If you want to continue developing your music and improving as an artist, then stage 5 should be your default way of thinking—you must be constantly collaborating with others: other producers, musicians…anyone who can help you improve or give feedback on your work in progress.
Collaboration is a powerful tool for taking your music production to the next level.
There’s really no excuse for not collaborating; if you live in an area where no one makes music, you can either collaborate with someone over the internet or move.
The more people who hear your stuff, especially other producers or fans of electronic dance music (EDM), will help create opportunities for gigs and licensing deals that lead to long-term success as an artist.
What’s certain is that the mastery stage, does not end here; it continues onward throughout life…

What now?
Choose a free course or a masterclass.
A masterclass is a class where other people teach you how to do something.
In the case of an electronic music production masterclass, it could be a course in which other people show you how to make electronic music that sounds professional and amazing.