You’re about to release your creative potential and transform your humble abode into a professional-grade EDM home studio, all without breaking the bank. Start by choosing the right equipment, such as a DAW and computer, audio interfaces, monitor speakers, and a MIDI keyboard, considering your budget and production needs. Invest in essential software like Ableton Live, FL Studio, and plugins like Serum and FabFilter Pro-Q. Optimize your space for sound with DIY soundproofing, acoustic treatment, and absorption panels. Set up your workflow efficiently with DAW customization, project management, and recording techniques for beginners. And, get ready to take your EDM production to the next level with tips on mixing, mastering, and beat production – there’s much more to discover.
Key Takeaways
- Choose a DAW and computer with at least 8GB RAM and a multi-core processor for efficient production.
- Invest in essential equipment like audio interfaces, monitor speakers, and MIDI keyboards that fit your budget and needs.
- Optimize your space with soundproofing and acoustic treatment using DIY solutions like absorption panels and bass traps.
- Set up an efficient workflow by customizing your DAW, creating project templates, and organizing samples and presets.
- Focus on developing your skills in recording techniques, mixing, and mastering to produce high-quality EDM tracks on a budget.
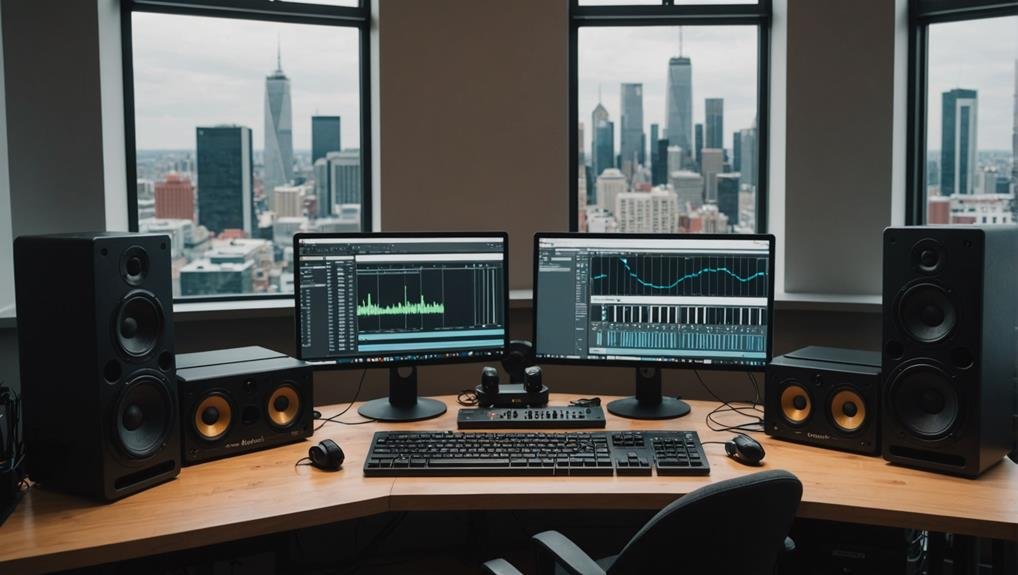
Choosing the Right Equipment
Since you’re investing in an EDM home studio, you need equipment that fits your budget and meets your production requirements.
Your studio’s foundation is built around a digital audio workstation (DAW) and a reliable computer. Consider a laptop or desktop with at least 8GB of RAM and a multi-core processor.
For audio interfaces, popular options include the Focusrite Scarlett and PreSonus AudioBox.
Invest in a good pair of monitor speakers, such as the KRK RP5 G3 or Yamaha HS8, to guarantee accurate sound reproduction.
A MIDI keyboard, like the Novation Launchkey or Akai MPK Mini, allows you to create and control virtual instruments.
Essential Software for EDM
What’s holding you back from producing tracks like your favorite EDM artists? The right software can make all the difference.
You don’t need to break the bank to get started. Here are the essential software tools you need to get started:
- Ableton Live: The industry standard for live performances and studio production.
- FL Studio: A popular choice for hip-hop and electronic producers.
- Serum: A wavetable synthesizer for creating unique sounds.
- FabFilter Pro-Q: A high-quality EQ plugin for precise tone shaping.
- Ozone: A thorough mastering suite for professional-sounding tracks.
With these tools, you’ll be well on your way to creating professional-sounding EDM tracks from the comfort of your own home studio.
Optimizing Your Space for Sound
You’re not just building a home studio, you’re creating a sonic sanctuary where your music can thrive.
To achieve this, you’ll need to tackle two essential aspects: soundproofing the room to prevent echo and sound leakage, and acoustic treatment essentials to control reverberation and resonance.
You’ve made it! With these affordable EDM home studio essentials, you’re ready to start producing like a pro. Did you know that 72% of music producers start out in their own home studios? You’re in good company! Now, get creative and experiment with your new setup. Remember, the key to success lies in practice, patience, and persistence. Happy producing!
Soundproofing the Room
Your studio’s acoustics are only as good as the room they’re in, and a well-soundproofed space is essential for producing high-quality EDM tracks.
You’ll want to focus on reducing external noise and preventing sound from escaping. This will help you work more efficiently and avoid disturbing others.
- Seal gaps and cracks in walls, floors, and ceilings with acoustic caulk or spray foam
- Install mass-loaded vinyl or acoustic panels on walls and ceilings to absorb sound
- Use door sweeps or threshold seals to block sound from entering or exiting
- Add insulation to walls and ceilings to reduce sound transmission
- Replace hollow doors with solid-core or soundproof doors to minimize sound leakage
Acoustic Treatment Essentials
By the time you’ve soundproofed your room, you’ve taken an essential step towards creating an ideal environment for producing high-quality EDM tracks.
However, soundproofing alone isn’t enough. You need to optimize your space for sound with acoustic treatment. This involves reducing echo, reverberation, and resonance that can muddy your mixes and skew your perception of sound.
You’ll need to add absorption panels, bass traps, and diffusion tools to your studio. Place absorption panels on walls and ceilings to absorb high-frequency reflections.
Bass traps will help control low-end resonance. Diffusion tools will scatter sound waves, preventing hotspots and early reflections.
With proper acoustic treatment, you’ll get a more accurate sound, making it easier to create tracks that translate well to any system.
Budget-Friendly Acoustic Solutions
You’ll need to address sound reflections and echoes in your home studio to produce high-quality mixes.
Since professional soundproofing can be expensive, you’ll want to explore budget-friendly options, such as DIY soundproofing methods and affordable acoustic panel alternatives.
Soundproofing on a Budget
Acoustic chaos reigns supreme in untreated rooms, making soundproofing an essential step in creating an EDM home studio.
You can’t ignore the importance of soundproofing, as it directly affects the quality of your productions. Fortunately, you don’t have to break the bank to get started.
- Use mass-loaded vinyl or acoustic blankets to absorb sound waves and reduce echo.
- Seal gaps and cracks in walls and doors with acoustic caulk or spray foam.
- Hang thick, heavy curtains or drapes to block sound transmission.
- Add area rugs to reduce floor reflections and reverberation.
- Utilize DIY soundproofing panels made from affordable materials like Owens Corning 703 and fabric-wrapped frames.
Acoustic Panel Alternatives
While addressing soundproofing on a budget, you’ve likely invested in DIY soundproofing panels made from affordable materials. However, these panels mightn’t provide the desired acoustic treatment for your studio.
That’s where acoustic panel alternatives come in. Consider using thick blankets or moving pads to absorb sound waves. You can also repurpose furniture like bookshelves or dressers to diffuse sound.
Additionally, hang fabric or vinyl banners on walls to reduce echo. These budget-friendly solutions can greatly improve your studio’s acoustic environment.
Experiment with different placements and combinations to find the best results. By thinking outside the box, you can achieve professional-grade sound quality without breaking the bank.
Setting Up Your Workflow Efficiently
A well-organized digital audio workstation (DAW) is the backbone of an efficient workflow.
You’ll want to customize your DAW to fit your creative needs, ensuring a seamless production process. This means setting up a logical project structure, labeling tracks and scenes, and creating a consistent color-coding system.
- Create a template with your go-to plugins and settings to save time on future projects
- Set up a “sandbox” track for experimentation and idea generation
- Organize your samples and presets into easily accessible folders
- Establish a consistent naming convention for tracks, scenes, and projects
- Use DAW-specific features, such as Ableton’s “Collect All and Save,” to simplify file management
Recording Techniques for Beginners
Now that you’ve set up your DAW for efficient workflow, it’s important to focus on capturing high-quality audio.
As a beginner, it’s crucial to understand the fundamentals of recording techniques. Start by choosing the right microphone for your instrument or vocal style. For example, dynamic microphones like the Shure SM58 are ideal for loud sources, while condenser microphones like the Blue Yeti are better suited for softer sources.
Next, set your gain levels correctly to avoid distortion or low signal. Use the “gain staging” technique to optimize your signal flow.
Mixing and Mastering on a Budget
Crafting a professional-sounding mix and master is an essential step in music production, but it can be intimidating for beginners on a budget.
You don’t need to break the bank to achieve a polished sound. Focus on developing your ears and skills, and utilize free or affordable tools to get the job done.
- Use plugins like Ozone Elements or T-Racks to get started with mastering
- Experiment with EQ techniques to balance your mix
- Pay attention to your track’s gain staging to avoid clipping
- Reference commercial tracks in your genre to inform your mixing decisions
- Take breaks and revisit your mix with fresh ears to catch mistakes
Soundproofing on a Shoestring
Silence is a luxury in the world of music production, and it’s an essential element in creating a professional-sounding track.
You don’t need a fancy studio to achieve this; with a little creativity, you can soundproof your home studio on a shoestring budget. Start by identifying the areas where sound is escaping or entering your room. Seal gaps around doors and windows with acoustic sealant or weatherstripping.
Hang thick curtains or blankets to absorb sound waves. DIY acoustic panels made from Owens Corning 703, Roxul Safe’n’Sound, or even old CDs and fabric can help reduce echo and reverberation.
Producing EDM Beats Like Pro
Your drum machine is the heartbeat of your EDM track, and a professional-sounding beat is essential to getting the party started. You don’t need to break the bank to create a beat that’ll get the crowd moving. With a few essential techniques and tools, you can produce EDM beats like a pro.
- Start with a solid kick drum sound, as it’s the foundation of your beat. Experiment with different tunings and processing techniques to find the perfect sound.
- Use a sidechain compressor to create space in your mix and add energy to your beat.
- Experiment with different drum patterns and rhythms to create a unique sound.
- Don’t be afraid to get creative with your percussion elements, such as adding shakers or tambourines to add texture.
- Practice, practice, practice – the more you produce, the better you’ll become at crafting beats that’ll get the party started.
Frequently Asked Questions
Can I Use a Laptop as My EDM Home Studio Computer?
You can use a laptop as your EDM home studio computer, but consider its processing power, RAM, and storage to handle demanding music production software and large sample libraries, ensuring smooth performance.
Do I Need a Soundcard for My Home Studio Setup?
When racing, a high-performance car needs a proper exhaust system to release its power; similarly, your laptop’s audio output needs a soundcard to access professional sound quality, so yes, you need a soundcard for ideal audio performance.
Can I Use Headphones for Mixing and Mastering Tracks?
You can use headphones for mixing and mastering, but it’s essential to choose accurate, flat-response models, as bass-heavy or colored headphones can mislead your mixing decisions, potentially affecting your track’s overall sound.
How Do I Deal With Noise Complaints From Neighbors?
You’ll want to soundproof your space by sealing gaps, adding mass, and using acoustic panels to minimize sound leakage, then communicate with your neighbors to set boundaries and find a mutually agreeable solution.
Can I Learn to Produce EDM Beats Without Prior Experience?
Did you know 90% of Grammy-winning producers are self-taught? You can learn to produce EDM beats without prior experience! Start with online tutorials, practice with DAWs like Ableton or FL Studio, and experiment with genres to find your unique sound.